
Final Cut Pro - Using compressor to render from an image sequence
06/03/11 00:34 Filed in: Tutorial | Final Cut Pro
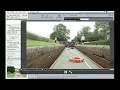
This tutorial shows shows how to convert an image sequence to a ProRes movie using compressor and how to avoid missing frames from the end result.
This tutorial shows how to convert an image sequence to a ProRes movie using compressor. I recently needed to create an image sequence and noticed the ‘add image sequence’ function in compressor. All was well until I checked the render which was short by a few frames. After much pulling out of hair, I found what I think to be, a bug. All is not lost, and I discuss in the tutorial, the workaround. This allows you to utilise the full power of compressor, with it’s batch features and multiple CPU handling, to tackle rendering of image sequences, rather than relying on Quicktime 7 pro.
Primarily this tutorial is aimed at taking timelapse image sequences from a DSLR and creating a ProRes Movie of the image sequence, so there is an emphasis on setting up aspect ratio and cropping, but the tutorial is general enough to be applied to any image sequence.
blog comments powered by Disqus